Tuesday, July 14, 2020

Mitten Box


It''s Christmas in July!


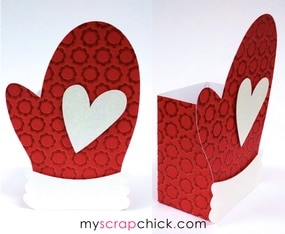
Today I am sharing a Christmas Mitten Box from My Scrap Chick. 


MATERIALS

 Mitten Box  pattern from My Scrap Chick
Old World Winter Stack from the Paper Studio
8 inches of ivory flower trim
5 inches of .5 inch Christmas ribbon
small red gems
3 small flowers
craft glue and glue dots
6 inches of red/white twine


I used the Old World Winter Stack from the Paper Studio for my box. I enlarged the file to 11.5 inches.


 I added ivory trim to the top and bottom of the mitten band. Then a strip of Christmas ribbon was added across the middle of the band. Red gems were added around the mitten and the heart. The heart was added to the center of the mitten, then a sentiment cut from one of the papers was added to the bottom left of the heart. A twine bow was attached to the right side of the heart with a small glue dot. Two gold flowers were added to the top of the heart with large glue dots and an ivory flower was added to the center of the mitten band.

This box would be great for all those Christmas goodies.

Merry Christmas in July!

Shirley

Sunday, July 12, 2020

Pinwheel Wreath


Hi! It's been awhile since I have shared a papercraft project with you. Today I am sharing this beautiful pinwheel wreath. I used Pinwheel Star from My Scrap Chick for this wreath.


MATERIALS

14 inch green flocked Styrofoam wreath
double sided paper (I used Modern Millinery Signature Paper by COLORBOK)
1 inch  and 5/8 inch circle punches (optional)
large brad fasteners
hot glue
2 feet of 3/4 inch ribbon for a hanger (optional)

     I used a 14 inch green flocked Styrofoam wreath from my crafting stash as the base for my wreath. You can use a smaller wreath and use fewer pinwheels if you desire. If you use a plain Styrofoam wreath I would wrap the wreath with 6 feet of ribbon.

     I made approximately 50 pinwheels ranging from 5 inches, to 3.5 inches, to 2.5 inches. (A different wreath base will require a different number of pinwheels.) I used 6 different papers alternating which side faced out. I used a 1 inch circle in the center of the large and medium pinwheels and a small circle in the center of the smaller ones. (You could also use the stars from the file.) The pinwheels are secured in the centers with larger brad fasteners.

    If you want a ribbon for hanging the wreath tie it around the wreath and tie a knot. Leave about six inches, tie another knot, then tie the remaining ribbon into a bow.

 I started with the largest pinwheels, evenly spacing them and alternating their positions and patterns around the wreath. Then I added the medium sized pinwheels, ending with the smallest pinwheels to fill in any empty spaces. I nestled them close together because I didn't want a lot of the base to show.


Here it is hanging on the inside of our front door. Sorry the picture isn't very good.


It may look like this wreath is an awful lot of work, but it actually was quite quick and easy to make. Give one a try!

Thanks for stopping by.

Shirley

Monday, July 6, 2020

Bliss Beach


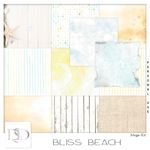
D's Designs has a new collection out today called  Bliss Beach which is perfect for all your summer digital beach layout. The above layout is of my two granddaughters swimming in Lake Michigan a few years ago.


The Bliss Beach Collection can be found HERE:

Here is a second layout created with this collection. This one is of my husband fishing with our granddaughters several years ago.


If you have beach, boating &/or fishing pictures to scrapbook, this collection will be perfect.

Thanks for looking!

Shirley