Showing posts with label My Scrap Chick. Show all posts

Tuesday, July 14, 2020

Mitten Box


It''s Christmas in July!


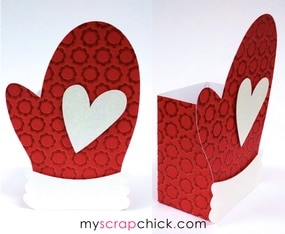
Today I am sharing a Christmas Mitten Box from My Scrap Chick. 


MATERIALS

 Mitten Box  pattern from My Scrap Chick
Old World Winter Stack from the Paper Studio
8 inches of ivory flower trim
5 inches of .5 inch Christmas ribbon
small red gems
3 small flowers
craft glue and glue dots
6 inches of red/white twine


I used the Old World Winter Stack from the Paper Studio for my box. I enlarged the file to 11.5 inches.


 I added ivory trim to the top and bottom of the mitten band. Then a strip of Christmas ribbon was added across the middle of the band. Red gems were added around the mitten and the heart. The heart was added to the center of the mitten, then a sentiment cut from one of the papers was added to the bottom left of the heart. A twine bow was attached to the right side of the heart with a small glue dot. Two gold flowers were added to the top of the heart with large glue dots and an ivory flower was added to the center of the mitten band.

This box would be great for all those Christmas goodies.

Merry Christmas in July!

Shirley

Friday, January 24, 2020

Heart Box with 3D Bow


 Valentines Day will be here before we know it. Today a made a Heart Shaped Box with a 3-D Bow. Bits of lace and some gems made the box extra special.


For my box I used PCD Heart Box With 3D Bow from My Scrap Chick.

PCD - Heart Box with 3D Bow: click to enlarge


MATERIALS

Box bottom: Cricut Corrugated Cardstock, yellow cardstock
Box top: DCWV Samantha Rose, flowered print
Bow: Colorbok Signature Paper, Modern Millinary, pink polka dot
Yellow/white gathered lace
Yellow gems
Tacky glue & hot glue
brad

Using Tacky Glue, construct the box bottom and lid. The bow gave me the most trouble.
Make a loop with the smallest piece and put the brad through the lined up holes. (I cut the bow from double sided cardstock.)


Take the shorter strips, loop them together as shown and slip them over the brad.


Do the same with the longer strips.


Finally add the large X shaped piece.

Carefully holding all the pieces together, slip the brad into the hole in the lid and secure.


Using hot glue, I attached the lace to the side of the box lid lining the edge of the lace up to the top of the lid. I went from the bottom to the top using two pieces of lace.


Finally, I added yellow gems along the edge of the lace, one row on the side and one row along the top of the lid.


Now I can hide all kinds of Valentine goodies inside my beautiful Heart Box.

Have a great day my crafty friends!

Shirley


Friday, December 13, 2019

3-D Snowflakes


We certainly have been getting a lot of snow lately. In between trips outside to shovel the snow I made some 3-D snowflake decorations.


I used Rosette Frozen Snowflake for the base of the snowflake and Snowflake Layers for the rest of the snowflake.

Rosette Frozen SnowflakeSnowflake Layers: click to enlarge

The base rosette layers is sized to a height of 12 inches, and is cut from white cardstock. The finished rosette is about 7.5 inches across.

The Snowflake layers are cut from glitter cardstock. I used the layer with the solid center as the bottom layer. It was cut from white glitter cardstock and is about 5.5 inches across. The other two layers were cut from two shades of blue or pink glitter cardstock and measure 4.5 inches and 3.8 inches across. I inked each snowflake with coordinating ink.


 The Snowflake Layers were stacked together with foam tape and foam dots to add dimension.

Top layer.

Middle layer. 


Bottom white layer.

A .75 inch glitter snowflake sticker was put in the center and a .25 inch gel gem sticker added to the center of the glitter snowflake.


These snowflakes make beautiful tree ornaments, but I ended up putting mine in my bow window. Try making some; they're quick and easy, and so pretty!

Happy Winter! 

Shirley

Wednesday, October 30, 2019

Witch Shoes


Hi! Sorry I've been MIA for awhile. My son and his family have been building a house and everything has been going wrong. Anyway, since tomorrow is Halloween, I figured it was time to make treat boxes for my granddaughters.


For my witch shoes I used CG_Witch Shoe Box from My Scrap Chick.

CG - Witch Shoe Box: click to enlarge


I enlarged the file slightly and followed the included PDF instructions on how to put the shoes together. It was very easy to do. I used the Spooky Delight stack by DCWV for my shoes. I also used scraps of orange glitter cardstock for the buttons and gold glossy cardstock for the buckle. I inked all the edges with black ink. The finished shoe measures 6.5 inches long by 5 inches tall. 


I think my granddaughters will love them. It's a quick project, so there is still plenty of time to make one or two Witch Shoe Boxes for your little witches and goblins. 

Thanks for looking. Happy Halloween!

Shirley

Wednesday, September 4, 2019

Pirate Ship Boxcard

Ahoy Maties!


Hi! Today I am sharing this cute Pirate Ship Box Card from My Scrap Chick. You can find the file HERE: I also added a little pirate using the Bella and Baxtor Pirates file which you can find Here:


               CG - Pirate Ship Box Card: click to enlarge                                               Bella & Baxtor Pirates: click to enlarge       

The files imported into Design Space at the correct sizes. I used the Warm & Cozy Stack from the Jen Hadfield Home Made Collection for the boat base. I used scraps from my stash for everything else. The card went together easily.

The little pirate was made 3 inches tall including his hat. I attached him to the card with a couple foam dots.


Thanks for stopping by.


Shirley

Wednesday, June 26, 2019

Star Box


Today in preparation for the 4th of July, I played with the Star Box Trio file from My Scrap Chick. I used the small and medium boxes. I used papers from these paper stacks:

Vintage Nation by the Paper Studio
Americana Designer Paper by COLORBOK

When gluing the boxes together make sure the corners with the deeply cut corners are folded into mountain folds and used as the outside points of the boxes and lids.


Medium Box


Small Box

If you put the layers of the topper together with foam tape you will get a 3-D effect.


I hope you liked my Star Boxes!


Happy Fourth of July!

Shirley

Sunday, April 7, 2019

Big Bunny Baskets


Hi! I just finished making these sparkly bunny baskets for my two granddaughters. I used the adorable Big Bunny Basket file from My Scrap Chick for my baskets and used glitter cardstock to make them shimmer like diamonds.

Materials 

Pastel Glam Glitter Polka Stack  from The Paper Studio
bright pink and white glitter cardstock from Recollections
scrap of glossy black cardstock (source unknown)
patterned cardstock scraps for bows from DCWV
tacky glue
Zig 2 Way Glue pen
foam squares
2 white brads per basket


Make sure to watch the My Scrap Chick video tutorial for the Big Bunny Basket before starting your basket, and have fun. These basket are good sized so you can fit lots of goodies in them. 


Thanks for stopping by!
Happy Easter!

Shirley

Tuesday, March 5, 2019

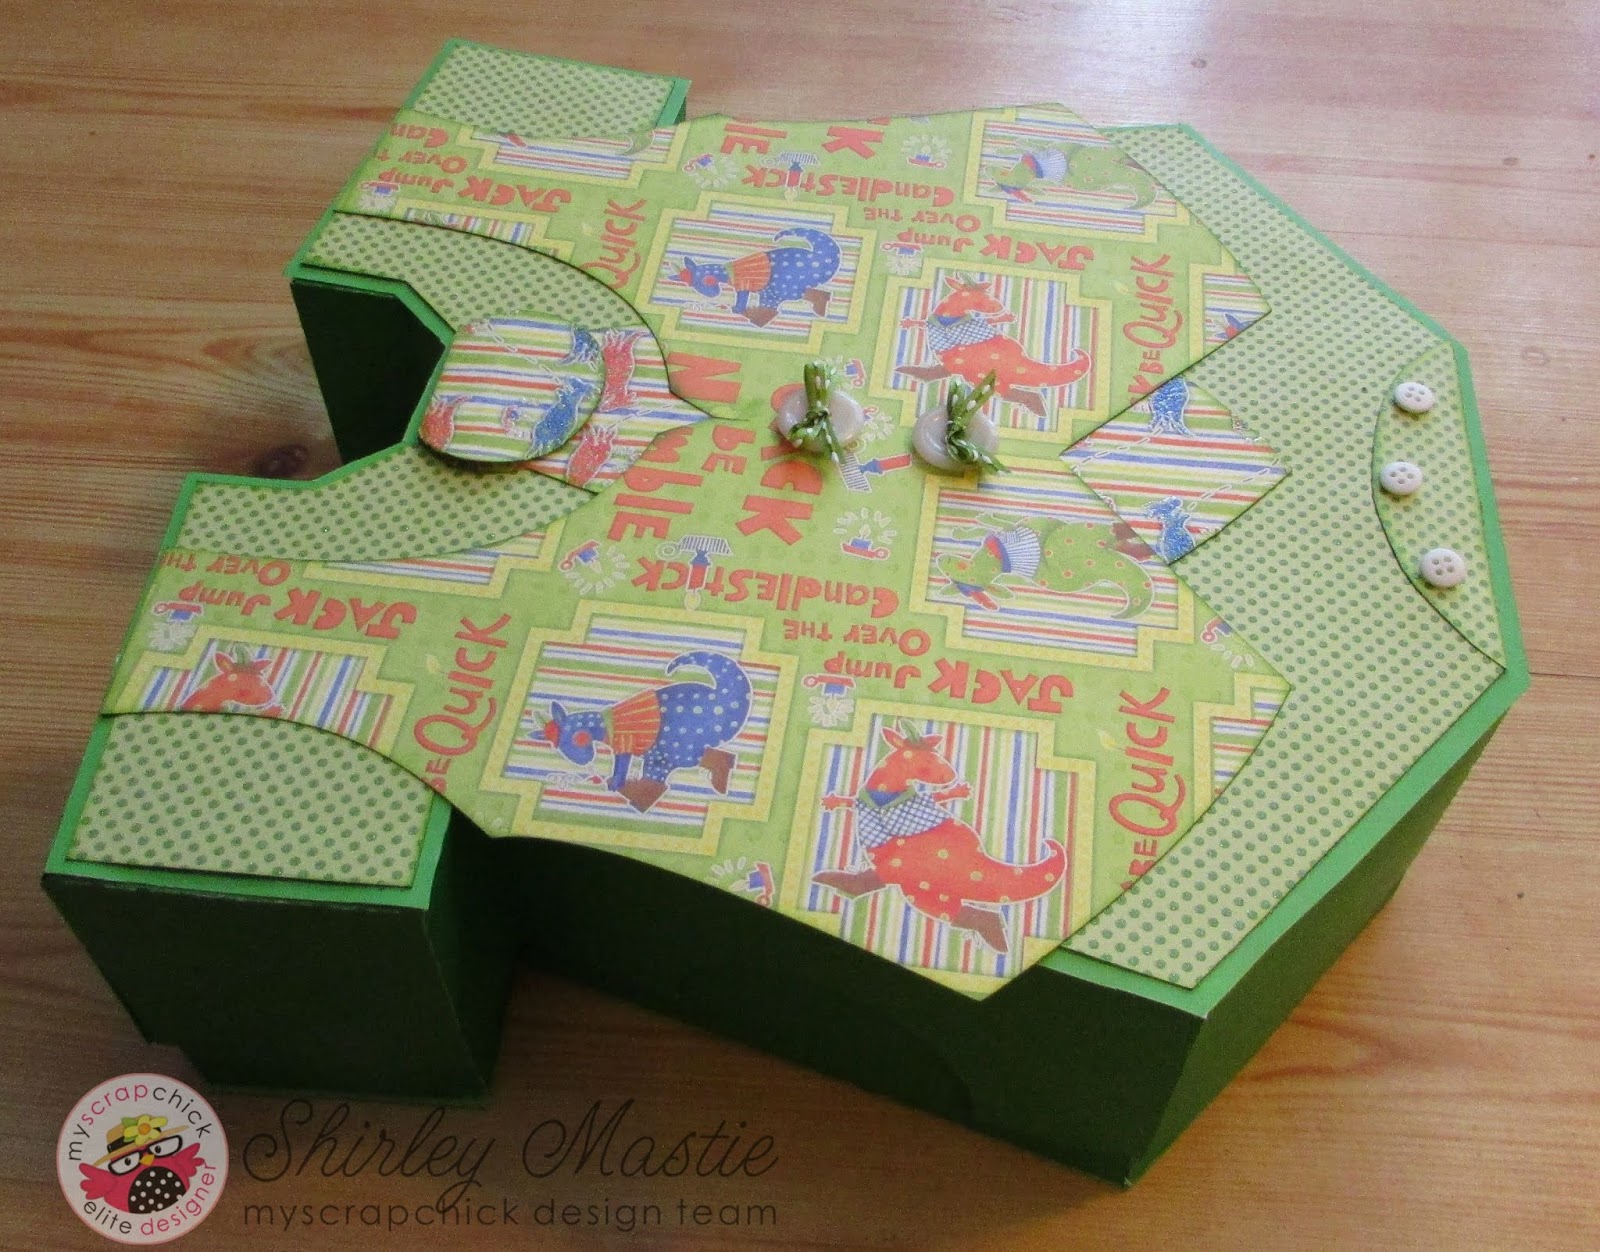
Boy's Onesie Gift Box Set


A dear friend of mine recently gave birth to a sweet little baby boy and I knew that I had to make her this adorable gift box and card set.


I used Onesie Gift Box-Boy for the gift box and Onesie Overalls Flat Fold Card for the gift card. Both files are from My Scrap Chick.

Onesie Gift Box Boy : click to enlargeOnesie Overalls Flat Fold Card: click to enlarge          

 The box was sized so it fit on a 24 inch mat. I used tagboard for the box and the Nursery Rhyme Glitter Stack from Debbie Munn for the prints.The green dotted glitter cardstock is from Uptown Flair by the Paper Studio. I used real buttons as accents.


For the card I used Stampin Up Cardstock for the card base and the same cardstock stacks as for the box.  Again I used real buttons for accents.


I hope you liked my little boy gift box set. 
Thanks for stopping by.

Shirley

Monday, February 11, 2019

Sweet Geisha Charlie


Hi! Today I'm on the LBBS blog with a 3-d layered card using "Sweet Geisha Charlie" from Little Blue Button Stamps and the "Vintage Card With Oval Frame" file from My Scrap Chick.


You can find Sweet Geisha Charlie here:
https://lbbstamps.com/product/sweet-geisha-charlie-digital-stamp-for-cardmaking/


Cardstock Used

Flowered print, BELLA FLORA Stack by Craft Smith
Pink Dots by Bazzil
Pink Cardstock by Craft Smith
Black Cardstock by Recollections
Light pink, yellow and green cardstock scraps.

Other Materials

Foam tape
Green gems
glue

I colored the image with Prismacolor Pencils.

Color Palette

Skin: Henna 1031, Peach 939, Light Peach 927, Yellow Ochre 942,  Cream 914, Blush Rose 928

Hair: Black, Cool Grey 90%, Coll Grey 70%, Cool Grey 50%,      Peacock Blue, Light Aqua

Dress: Kelp Green 1090, Lime Peel 1005, Pale Sage 1089


Here are the My Scrap Chick files I used.


Vintage Card with Oval Frame: click to enlarge                                               Apple Blossom: click to enlarge         


You can find the files here:
  https://www.myscrapchick.com//product.cfm?product=2153 and here:
https://www.myscrapchick.com//product.cfm?product=2174                  


Using foam tape between the top three layers, I put the card together as shown.


I added apple blossoms from the "Apple Blossom" file from My Scrap Chick to the top left side of the frame. I shaped them slightly with my fingers and added a green gem to the center of each flower.

I very happy with the way this card turned out. 
Thanks for stopping by!