Showing posts with label gift box set. Show all posts

Wednesday, June 26, 2019

Star Box


Today in preparation for the 4th of July, I played with the Star Box Trio file from My Scrap Chick. I used the small and medium boxes. I used papers from these paper stacks:

Vintage Nation by the Paper Studio
Americana Designer Paper by COLORBOK

When gluing the boxes together make sure the corners with the deeply cut corners are folded into mountain folds and used as the outside points of the boxes and lids.


Medium Box


Small Box

If you put the layers of the topper together with foam tape you will get a 3-D effect.


I hope you liked my Star Boxes!


Happy Fourth of July!

Shirley

Tuesday, March 5, 2019

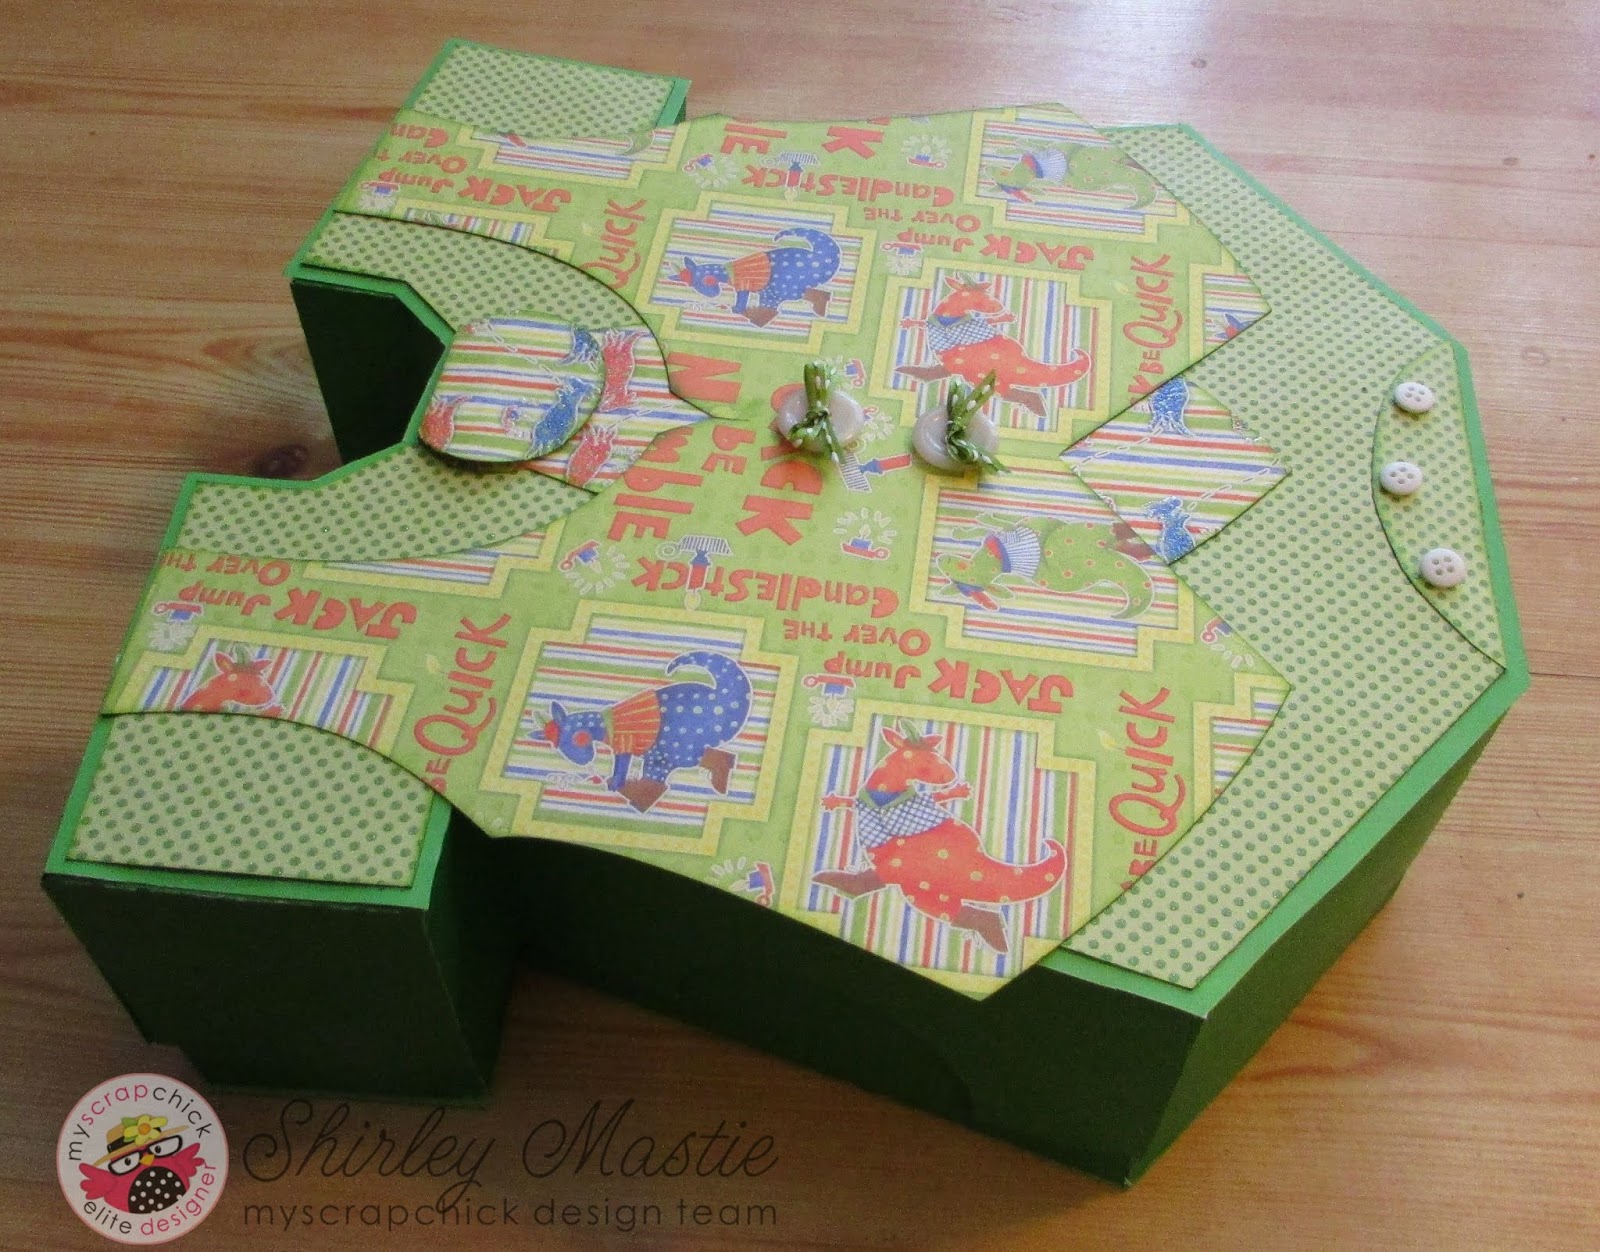
Boy's Onesie Gift Box Set


A dear friend of mine recently gave birth to a sweet little baby boy and I knew that I had to make her this adorable gift box and card set.


I used Onesie Gift Box-Boy for the gift box and Onesie Overalls Flat Fold Card for the gift card. Both files are from My Scrap Chick.

Onesie Gift Box Boy : click to enlargeOnesie Overalls Flat Fold Card: click to enlarge          

 The box was sized so it fit on a 24 inch mat. I used tagboard for the box and the Nursery Rhyme Glitter Stack from Debbie Munn for the prints.The green dotted glitter cardstock is from Uptown Flair by the Paper Studio. I used real buttons as accents.


For the card I used Stampin Up Cardstock for the card base and the same cardstock stacks as for the box.  Again I used real buttons for accents.


I hope you liked my little boy gift box set. 
Thanks for stopping by.

Shirley

Saturday, October 27, 2018

Sunflower Greetings Card Set


Today I am sharing a sweet Sunflower Greeting Card Set which would make a great Thanksgiving Hostess Gift or just a gift for someone you appreciate.


I made this set using Sunflower Greetings from My Scrap Chick. 

Sunflower Greetings: click to enlarge

The pattern includes patterns for a card, a tag and tag pocket, plus the gift box. I made two cards and two tags, but the box could easily hold three of each.


I used Beach House 
double sided paper by COLORBOK for my project. Double sided paper works best for the box and tag holder so the pattern will show on the inside.


I cut a second mat from the card and tag (blue layer on the tag and orange layer on the card) from white. These were added to the inside of the card and the back of the tag so a message can be added.


I love this set! It's so easy to put together and looks great. Why not make a set for someone you are thankful for.

Thanks for stopping by!
Have a great crafty day!

Shirley

Tuesday, August 21, 2018

Apple Picking Time


It's that time of year - Apple Picking Time!


I made two Apple Boxes and an Apple Shape Card using the My Scrap Chick files, Sliced Apple Card which is the current Freebie, and Back to School Project Bundle for the Apple Boxes.

Sliced Apple Card                                                                                              Back To School Project Bundle


For the Sliced Apple Card I used a tan leaf patterned cardstock from my stash for the base. The plaid cardstock is from the Jen Hadfield Home-made Collection, The off-white is from Stampin Up and the other cardstock is from Recollections. I added a red twine bow to the top.


This box was made with the same supplies, except I made the box using red tagboard so it would be stronger.


The above box also uses all the same supplies plus a red print from Beach House by COLORBOK.

This set would be great for Back to School gifts for the kid's teachers.

Thanks for stopping by! Have a great day!

Shirley


Saturday, July 21, 2018

Picnic Time


Do you want to go on a picnic?


I made this cute little picnic basket using the Picnic Basket and Sandwich file from My Scrap Chick. I also used A2 Layered Roses Card for the flowers.


A2 Layered Roses Card: click to enlargePicnic Basket and Sandwich: click to enlarge


I made the basket using the cream colored cardstock from a Neutrals Stack by Colorbok. I used the Samantha Rose Stack by DCWV for the floral  print, and the pink embossed print by BAZZILL for the exterior panels of the basket. I used a second copy of the basket for the pink basket panels and the floral areas on the lid. The floral strips on the body of the basket are one inch wide at the top and 3/4 inch wide at the bottom. The basket weave effect was created with 1/8 inch wide cream strips cut to size. The handle was attached with cream colored brads. 


The flowers were made from light pink cardstock scraps. A yellow gem was added to the middle of each flower. They were attached to the lower right corner with foam tape. Green leaves were added. A light pink ribbon bow was added to the other side.


This basket would be perfect for a small present or treat. I love it!

Have a great weekend: maybe go out for a picnic!

Shirley


Friday, January 26, 2018

Party Owls Gift Box Set


I can't believe that my granddaughter is turning 14! They grow up way too fast. Since she loves owls I made her this cute little gift box set using Party Owls from My Scrap Chick.


Party Owls: click to enlarge


I used papers from the  Bella Flora paper pad by Craft Smith for the box and papers from my scraps stash for the hat. I duplicated the body and wings and flipped them horizontally for the back of the box. I added googly eyes to the owl and gems to the hat.


I attached the hat to the tag with foam tape and added pink twine. 

                                      (Sorry for the blurry picture.)


Thanks for stopping by. Happy crafting!

Shirley

Sunday, January 14, 2018

Snowman Easel Match Box


Hi! Today I am sharing a cute snowman easel match box. I created this project by combining two files from My Scrap Chick, Snowman's Friend Easel Card and Sweet Nugget Matchboxes.


Snowman's Friend Easel Card: click to enlargeSweet Nugget Matchboxes: click to enlarge             

Keeping all the pieces grouped together, I started by making the easel card so it is six inches wide. I made the snowman using glitter cardstock from Coredinations. The rest of the card was made using papers from my stash. I attached the nose, hat brim and arm with foam tape to give the snowman dimension.  A snowflake and blue gem embellishment was added to the hat band. The sentiment was accented with snowflakes and also attached with foam tape. (My sentiment came from Digital Delights by Louby Loo.)


For the drawers I kept the file grouped together, then sized it so the box measured three inches across. I made two of these out of tagboard so they were sturdier. I glued the two boxes together, side by side, then wrapped them in a coordinating piece of heavy cardstock. The easel card was then attached on top of the two boxes.


I used my snowman box to gift some tea to a tea loving friend, but it would be great for any small treasures. I love how it turned out! 


Thanks for stopping by. I'd love to hear what you think. 

Shirley


Monday, December 18, 2017

Christmas Paver Favors


I've been busy lately making these cute little Christmas Paver Favor Boxes. Each box is approximately 4.25 by 3 inches. Perfect for small treasures. They are super easy to make, too.


These little favor boxes are so much fun to make for those last minute little gifts. ( I'm going to fill mine with a little cash!) Thanks for stopping by!

 MERRY CHRISTMAS!

Shirley

Sunday, December 3, 2017

Frosty's Top Hat


Hi! Today I am sharing a fancy snowman top hat box I made with files from My Scrap Chick.  I used Uncle Sam Hat Box for the box and Snowflake Layers for the large snowflake.

MATERIALS

Uncle Sam Hat Box and Snowflake Layers  files from My Scrap Chick
"Old World Winter" cardstock by the Paper Studio 
Glitter cardstock by Recollections
various Christmas silk florals
3/4 inch ribbon
snowflake stickers
small gems in sage and yellow
tape runner, glue and paper clips

After cutting out the pieces, I glued the main pieces together using a combination of tape runner and glue. The tape runner and paper clips hold the pieces together while the glue dries. 


The two largest octagons are used for the brim and the smaller ones are used for the boxes. 3/4 inch ribbon was added around the base of the hat. (I used 1/1/2 inch wide ribbon folded down to 3/4 inch. )
I used pieces of various floral stems to decorate the hat. I made a layered snowflake to add and also used snowflake stickers.


The inner part of the box lifts out as shown.


I love this file! You can use it for so many occasions! 

Thanks for stopping by!