Wednesday, November 25, 2015

Merry Christmas Skates


Today I am sharing another shape card using the KaDoodleBug Designs file, "Merry Christmas Skates." This is a perfect file for making shape cards. I used glitter paper for the skate and the snow, and fleece for the snowman. I used a lot of foam tape to put it together. If you would like to know how to make a shape card scroll down to my previous post showing with the "how to."
Have a wonderful Thanksgiving! ~ Shirley

Monday, November 23, 2015

Christmas Angel Bear


I would like to thank all those who hopped with us for the KaDoodle Bug Designs Holiday Hop over the week end, and would like to welcome all the new followers of my blog. I started out trying to personally answer all the great comments that were left, but soon got overwhelmed. Please know that even though I am not able to personally answer each one, I did read them all and appreciate all your comments!

Today I am sharing a cute little Christmas decoration that features " Christmas Angel Bear" from KBD.  


MATERIALS 

candy-cane decoration ( from the dollar store)
1 1/2 inch wide Christmas ribbon
Mulberry paper in light  brown
Flocked paper in tan and brown
Gold metallic paper ( for the halo)
White vellum (for the wings)
Glossy paper in white, red and green ( for the candy-cane)
Cardstock in brown (base)& black
Stiff brush
glue gun
adhesive
Chalks

I  sized my tear bear at 6 inches. I cut the pieces for the bear body out of scrap paper and traced them onto the back side of the mulberry paper, I then went over the traced lines with a wet paintbrush and carefully hand tore around them. Set these aside to dry. When they are dry, carefully brush the pieces from the center out until you get the fuzzy effect you want. Assemble your bear and chalk the edges.

  Make an 8 inch bow with the ribbon and hot glue the bow about 1 inch below the point where the two candy-canes meet. Hot glue the bear onto the bow so the bear's paws are even with the botton of the bow. I added the holly sprig that was on the candy-cane to the bear's paws. All finished! Easy Peasy.  Have a great day and thanks for stopping by! ~ Shirley

Saturday, November 21, 2015


Welcome to KaDoodle Bug Design's Holiday Blog Hop!  We are so excited to have you join us today! At each stop of the hop we hope you will be inspired by the creativity of the design team. 

You should be arriving from Jennifer's blog. If you happened across this post out of order, please head to the KaDoodle Bug Design's Blog to start at the beginning of the hop.

Here are the projects I created:

For my first project I made a little easel card box that would be perfect for treats or for a small gift. For my easel card box I used the adorable ""Here Comes Santa" file.


My finished easel card box measures 5 3/4 x 5 3/4 x 7 1/2 inches tall.  The basic easel card box pattern is available for free from the group, "Cricut Lovers Guide to Design Space."


I used flocked, velvet papers for Rudolph and his hat and Santa's pants, and glitter papers for the snow. I added a snowflake button for a drawer pull.


For my second project I made a pop up card using "Oh Ginger Snaps."


My finished card measures 5 1/4 x 5 1/4 inches. The patterned papers are all from DCWV. I added lots of glitter glue and bling for added sparkle.


I hope you enjoyed my projects  and thanks for stopping by! ~ DT Shirley

Your next stop is Sonja

Now for the Blog Hop Prize! 
8 FILES, that's right every new file used in this hop today!

What do you need to do to be eligible for this amazing prize?
1.  Become a follower of each blog in the hop. 
2.  Leave some comment love at each stop.  You can do so until midnight on Sunday, November 22 MST to be eligible for the prizes.
3. Be sure you "Like" KaDoodle Bug Design Facebook Fanpage
4.  If you do all of the above, check back at the KBD Fanpage for the winner on Tuesday, November 24th 

Here is the complete blog hop lineup:

KBD(Alma)
Sukie
Jennifer
                        Shirley (You are here)
Sonja
Mellisa
Jana
Saundra
Twila
Cathy
Katie
Sandra
Theresa
Barbara
Mitsyana
Jessi
Tanya

Tuesday, November 17, 2015

Merry Christmas Skates


When I saw this cute pattern, "Merry Christmas Skates" from KaDoodle Bug Designs I knew that the polar bear and penguin had to be tear bears, even though it has been a very long time since I made a tear bear.


MATERIALS LIST

Heavy mulberry paper in white
Glitter paper in white and red
Flocked or velveteen paper in black
Glossy green paper
Silver metallic paper
white cardstock (for the card base)
twine in red/white (about 18 inches)
small circle punch
adhesive

I made the card base by duplicating the base layer included in the svg file. I flipped one piece horizontally and welded the two base pieces together at the heel.

I cut all the pieces out of the appropriate papers except for the penguin belly and polar bear which were cut from cardstock. The cardstock penguin and polar bear pieces will be used as patterns and are traced onto the backside of the mulberry paper. Use a wet paintbrush to trace over your outlined shapes on the mulberry paper. VERY CAREFULLY tear out the shapes along the traced lines. Assemble your other card pieces while the mulberry dries. Use the circle punch to make 5 holes about 1/2 inch in from the front edge of the skate to use for lacing the skate. Tape down one end of the twine to the back and lace the other end through the holes as shown. Tape this end to the back and cut the twine. Make a little bow and glue it at the top just below where the penguin will be.

When the mulberry pieces are dry, take a stiff brush and CAREFULLY brush from the center out on each piece until you get the "fuzzy" effect you are after. Finish assembling your card.

I hope you enjoyed this little project and thanks for stopping by!
 ~ Shirley

Thursday, November 12, 2015

Elf in Stocking Card


Today I played with the KaDoodle Bug Designs digital version of "Elf in Stocking" which is a current freebie. I don't have any of the beautiful artist's pens that everyone seems to be using lately, so I decided to experiment with what I did have. Here's the result of my "play session."


Since I don't have any flesh colored pens that would give the effect I wanted, I used Stampin Up chalk to add a touch of color to the faces and hands of all my elves. I'll take each coloring medium I used one at a time. First, I used a variety of gel pens, some of which were glitter pens.


I was pretty happy with the results from the gel pens. The coverage was fairly smooth and I liked the added glitter effect from the glitter pens. The elf on my card was also done with gel pens.


I next experimented with Stampin Up watercolor pens and Zig blender pens.I was surprised that these gave a streakier effect than I expected. Maybe my results would have been better with different paper. I used plain Georgia Pacific cardstock. Since I have a complete set of these pens I think I will experiment some more with them and try to get better results.


Finally, I used a set of Stampin Up watercolor pencils. If you like a subtle, light, watercolor effect, these work really well. The blender pen worked very well blending the colors evenly. 


I hope my little experiment was helpful. I hope you have a happy, crafty day! ~ Shirley


Wednesday, November 11, 2015

Feeling Stuffed


Hello, today I am sharing a two page Thanksgiving layout with you. For my layout I used the adorable "Cutie KaToodles Turkey" and "Cutie KaToodles Pumpkin Turkey." I also used "Baking Goodies" for the pies.

Cutie KaToodles - TurkeyCutie KaToodles - Pumpkin Turkey


Baking Goodies - Click Image to Close


MATERIALS LIST

Harvest House Stack from DCWV
cardstock in white, brown, yellow, red, orange, green, light green and aqua
Embosser (I used the Cuttlebug)
Cuttlebug embossing folders: Simple Flowers, Swiss Dots and James Set
Ribbon: Autumn Collection by Made for Retail, Inc.
Kid's Red letters from Provo Craft
Adhesive


I used the Harvest House papers for everything except my paper piecings. I added a 1 1/4 inch strip of orange print, and a 1/2 inch strip of leaf print to the bottom of each page. I then cut a 2 inch brown print wavy scalloped border and a 1 1/2 inch wavy border from the leaf print. I stacked the smaller border over the larger leaving a 3/8 inch strip of the brown print showing at the top 
and a little of the brown scallop showing below. I added one of these to the top of each page. 

Next, I made four mats at 4 1/2 inches by 6 1/2 inches using the brown print, the orange print (two orange and two brown), white cardstock and the pumpkin print. I added a 1/2 inch strip of the brown print on the left side of each mat and added the leaf print ribbon on top.


I made the CK Pumkin Turkey 5 3/4 inches and the CK Turkey 5 1/4 inches. I used the three embossing folders and my Cuttlebug to emboss the tail feathers. The pies were made 3 1/4 inches long and 4 inches. The title box measures 3 inches by 4 3/4 inches. I hand cut around the title which was first placed on yellow cardstock. That was mounted on the brown print and trimmed around leaving only 1/8 inch of the brown showing. This was mounted on the orange print, then on white.

I hope you enjoyed my project and I wish you a wonderful Thanksgiving! ~ Shirley

Tuesday, November 3, 2015

Pumpkin Card


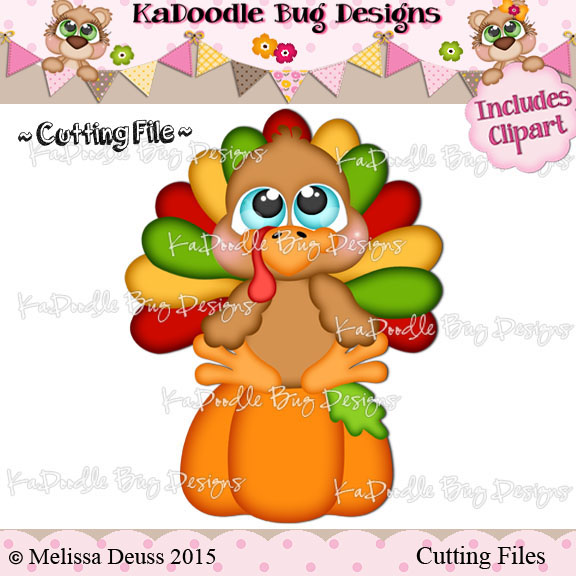
 I am always trying to think of new ways to use the svg patterns I already have. Today I made a Thanksgiving pumpkin card using the KaDoodleBug Designs pattern: "Charkin Cuties Got Candy Ghost." I chose a nice round pumpkin with two layers to use for my card. Here are all the materials I used for my card.

MATERIALS LIST

Cricut Explore
pumpkin pattern with two layers
oval tag ( I used one from Cricut)
gold pen to fit the Explore
Cuttlebug
cuttlebug embossing folder "Give a Hoot"
Darice embossing folder "Fall Leaves Swirl"
leaf patterned gold foil paper from "Harvest House Stack" by DCWV
Sturdy cardstock in orange and tan
brown Colorbox ink
4 inches of gold 1/2 inch ribbon
orange rafia
3/4 inch button
glue and glue dots
needle and thread


Once I imported my file into design space and deleted any parts I didn't need, I sized my pumpkin to 5 1/2 inches. I duplicated the base layer of the pumpkin, flipped it vertically and attached it to the other base piece to make the card. I added a score line where the two halves meet.  I then added a sentiment on the lower half of the card.  I made the leaves about 2 inches using the gold foiled paper from the DCWV stack. I added an oval cricut tag, sized it to 2 1/2 inches and wrote "Happy Thanksgiving" to be printed on it. I used Fontastic Fonts for all my printing. Your cricut screen will look something like this.


After my shapes were cut I ran only the front of the card through the cuttlebug using the "Fall Leaves Swirl" embossing folder. I ran the top layer of the pumpkin through the Cuttlebug using the branch folder from "Give a Hoot." I then inked the edges of all the pieces with brown ink and ran the inkpad lightly over the embossing of the pumpkin pieces. I attached the top layer of the pumpkin to the base layer using foam tape to give the card some added dimension.. 

Next I wound the rafia around my hand several times and secured it in the middle using the needle and thread. Using the same needle and thread, I attached the button and a 4 inch piece of gold ribbon folded on half  for the stem. I attached this to the top of the card with glue dots. Finally, I glued the tag next to the button, and tucked the leaves in around the button and tag.