Wednesday, June 29, 2016

4th of July Unicorn 3-d Star


Today I am sharing a 3-d star decoration using the KaDoodle Bug Designs file "CK 4th of July Unicorn" that can be found here:

http://kadoodlebugdesigns.com/shop/index.php?main_page=product_info&cPath=55&products_id=826

I also used a 12 inch tinsel star that I bought at the dollar store and an 11 1/2 inch 3-d star pattern from My Scrap Chick.


I glued the 3-d star to the tinsel star using a hot glue gun, pushing the sides in and being careful to line up the points. I added a 6 inch, four loop bow, made with 5/8 inch ribbon from Offray, to the center. Finally I added the completed unicorn to the center of the bow. The unicorn was made from glitter cardstock and is 5 inches tall.


This decoration looks good from both sides so I can hang it in the window if I want. I'm really happy with how this project turned out. Thanks for looking and Happy 4th of July! 
~ Shirley


Monday, June 20, 2016

Thanks Sew Much teepee card


Hi everyone!

Today is my first posting for Hostess Monday for Digital Delights by Louby Loo.


For my project I made a teepee card using the "Crafty Mouse Coordinating Set."

Crafty Mouse Coordinating set

MATERIALS

Plain 12 x 12 Recollections cardstock in light pink, bright pink, white, aqua and bright green.
Patterned  12 x 12 cardstock from Pixey Stix Paper Pack by the Paper Studio
Bright pink pearls by Jots
Two heart shaped buttons
Glue & double sided tape.

I used the Print Then Cut feature on my Cricut Explore to make my digital image and create my card base, but I will include directions for the card base for those who don't use an Explore.


I started with three 6 x 6 inch squares folded diagonally. I used different colors here, but they should all be the same color.


Glue the first two pieces together as shown being careful to put glue only in the areas that overlap. The blue piece below is the left piece in the above picture.


Glue the third piece so the three are lined up as shown. 


To make the mats use squares that are 5 3/4 and 5 1/2 inches cut in half diagonally. The small triangular pieces are made the same way using 2 inch squares. Glue them in place as shown. The open space in the upper left will be glued under the area in the upper right. (Or it can be velcroed closed if you want it to lie flat for mailing.)


Side and back views.


Now comes the fun part - decorating your card!
My image is 5 inches and is mounted onto a 6 3/4 inch double layered looped frame. (Mine is from Bird's Cards.) This was attached to the base with double sided tape.The sentiment was printed on a label from Cricut and is 2 1/2 inches by 1 1/2 inches. 
Bright pink pearls were added to the bottom of the base and onto the sentiment.
A heart button was added to each leg of the base.


The image was colored with Spectrum Noir Alcohol Markers.

COLOR PALETTE 

Mouse: BG1, BG2, BG3
Ears: PP1, PP3
Thread: PP2, PP6, EB1, EB2
Shoes: GT1, GT2, CG1, CG3
Bckgrd: PP1, PP6, CG1, GT1, BT1


Here is the link to the Design Space file for the card base: 

https://us.cricut.com/design/#/canvas/41091540

I think there are many more of these teepee cards in my future!

Thanks for stopping by!


Thursday, June 16, 2016

Under the Sea Side Step Card


Today I am sharing my design team project for Digital Delights by Louby Loo.


For my project I used the "Under the Sea Set" which can be found here:  http://digitaldelightsbyloubyloo.com/index.php?main_page=product_info&cPath=7_42&products_id=215


Card Recipe

Digital Stamps used: Under the Sea Set by Digital Delights by Louby Loo

SVG files used: Card base is a free download from the group, "Cricut Lovers Guide to Design Space." 
Seaweed, coral and waves from Cricut.
Mats from Cuddly Cute Designs

Cardstock/ Papers: Base cut from "All Dressed Up Glitter" from DCWV.
Mats behind the seahorse are from Pixey Stix by The Paper Studio.
Glitter paper by Core'dinations.
Shimmer paper by Recollections.
Image printed on Spectrum Noir Cardstock by Crafter's Companion.

Acc./Embellishments: various sized sequins, 6 pearls in three sizes.
Glue, foam tape.

The card base was cut from the DCWV cardstock at 10 by 6 3/4inches. I cut three sets of seaweed from shimmer cardstock at about 3 1/2 inches and one smaller set 2 1/2 inches tall. I cut two coral from orange glitter paper at 3 inches. The waves were cut from two shades
 of blue glitter cardstock and are 4 inches long. One large seaweed goes on the left section and the other two, along with the coral were glued to the last step so they flare out to the sides. The large wave was glued to the middle step and the smaller wave was attached in front of the larger one with foam tape. The smaller seaweed was attached to the left side of the waves.

The images were made using the Print Then Cut feature on my Cricut Explore. The mermaid is 4 1/4 inches tall, the turtle is 2 1/4 inches tall and the seahorse is about 3 inches tall. The turtle is mounted on a 4 1/2 by 3 1/2 inch mat set cut from the Pixey Stix cardstock. All these images were attached to the card base with foam tape to give the card dimension. The sentiment is 1 inch by 2 1/2 inches and was glued to the bottom right of the card.

Various sizes and colors of sequins were glued around the mermaid and seahorse. Four various sized pearls were attached to either side of the sentiment in a swirl pattern.

Spectrum Noir Alcohol Markers Used

Mermaid:
     Skin: FS2, FS4, FS6, TN2, PP1
     Bodice: PP1, PP2, BP3
     Body: PP1, LV1, FL3, CT4, DG1, CG1, CG3, BT4, BT6
     Shell: GB1, GB3, GB6, GB8, TN1
     Hair: BT1, BT2, PP1, PP2, HB1, HB2, FL3,  CT4, LV1, PL1,    CG1, CG3


Seahorse:
     CT1, FL3, LY2, CG3, DG2, FL2, OR2, OR3, IB1, IB2, HB1, HB2, LV3, 


Turtle:
     Turtle: DG1 CG1, DG2, DG4
     Rock: TN4, TN5, TN1, TN2
     Water: BT1, BT2, BT4
     Seaweed: DG3, DG2, CG1


Sentiment: FL2, FL3

I love how this card turned out! These images are so adorable!
Thanks for stopping by! I'd love to hear what you think. ~ Shirley


Wednesday, June 15, 2016

Fairy Bears


Today I played with combining KBD Cutie Katoodle patterns.


For my first Fairy Bear I combined the CK Cupcake Fairy Bear with the flower from the CK Sunflower Peeker Bear. This bear is 7 1/2 inches tall.


For my second Fairy Bear I combined the CK Ice Cream Fairy Bear with the flower from CK Bumble Bear Flower. This bear, with flower, is 5 1/2 inches tall.

I gave each bear vellum wings. The bottom layer is Juliana Lilacs from K & Co., and the top layer is dragonflies. (Source unknown.) I added six layers of 6 x 12 inch pieces of purple glitter tulle, gathered, and tied in the center with a 12 inch piece of purple, 1/8 inch ribbon. The extra ribbon was tied to make a hanging loop. A green and purple bow was added to each bear. 

These would make cute decorations for a little girl's room, a tree, or great decorations for a special package.


Friday, June 10, 2016

Silly Sister Swabbies Layout


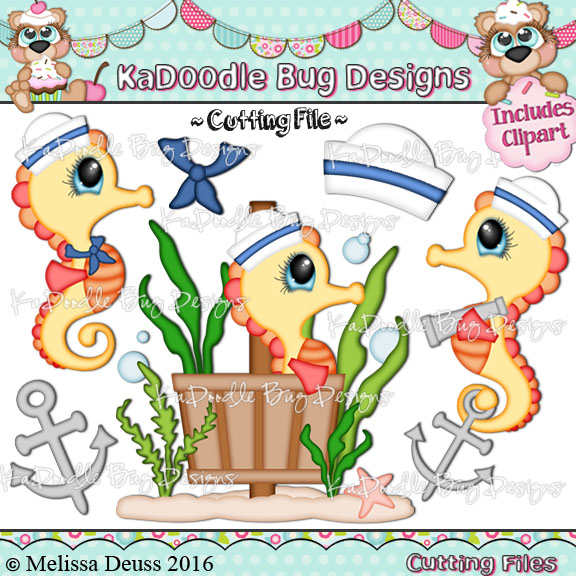
HI! Shirley here, sharing a two page layout I created using the KaDoodle Bug Designs file, "Sailor Seahorses."

Sailor Seahorses


Materials

Cardstock:
     Background paper - Dip Dyed by Craft Smith
     Glitter Cardstock - Core'dinations
     Pearlescent Cardstock - Recollections
     Regular cardstock - from my stash


The dip dyed cardstock was used as a background. The seaweed, anchors and spyglass are from pearlescent cardstock. The title, spines on the seahorses, coral, sand, and outer frame on the mats are from glitter cardstock.


The extra seaweed and title are from cricut. The seaweed is 9 inches tall, the seahorse is 4 inches tall, and the title letters are 3/4 inch tall.


The seaweed for this grouping is 5 1/2 inches tall, and the seahorse is 3 1/2 inches tall.


The seaweed grouping here is 11 inches tall, with the coral being 3 inches tall. The seahorse, including the anchor, is 4 1/2 inches tall.

I absolutely love this "Sailor Seahorses" file; it can be used for so many things! Thanks for stopping by. ~ Shirley


Thursday, June 2, 2016

YAY 4 YOU!


Hi! Today is New Release Day for Digital Delights by Louby Loo and I would like to share my card using "Y Yoyo" which can be found here:

http://digitaldelightsbyloubyloo.com/index.php?main_page=featured_products

CARD RECIPE


All DD stamps used: Zodiac Characters Y Yoyo

Cardstock and Papers: Image printed on Spectrum Noir Cardstock by Crafter's Companion, 
"In Bloom" printed paper by Sandylion, yellow and orange cardstock by Recollections

Markers: Spectrum Noir Alcohol Markers

Acc. Embellishments: Paper flowers by Recollections, Pearl Rhinestones "Songs of Spring" for Michaels, font from Cricut

Special technique: None

The pattern for the card shape comes from Bird's Cards. The card is 7 by 7 inches. I used the Hide Contour feature on my Cricut Explore to make solid mats for the bottom two layers. The image was printed on a 5 1/2 inch mat from Cricut, using the Print Then Cut feature.


SPECTRUM NOIR MARKERS USED

Skin: FS1, FS4, TN2, PP1
Hair: GB5, GB6, TN6, TN9
Shirt: CT2, CT4
Pants: FL3, FL2, CG3
Shoes: FL1, FL2
Y: CT2, CT4, GB3, OR1

Thanks for stopping by! ~ Shirley